
These Easter 3D pen ideas fall into three families: decorating real eggs, building small baskets and adding raised designs to cards. Cards are the quickest start, egg shells ask for a steady hand on a curve, and baskets take longest. Below are nine projects by difficulty, how to draw on a curved surface, what you need and step outlines for three of them.
Have a 3D printer too? Download our free Easter STL files: egg cups, an egg stand, a bunny, a chick and egg tags.
Which Easter project should you start with?
Pick by the time you have and who is holding the pen. Times marked 3Doodler come from 3Doodler’s own tutorials; for the other ideas we compare them with those projects rather than invent a figure. Allow extra for first attempts and small hands.
| Project | Family | Level | Time |
|---|---|---|---|
| 1. Raised flower card | Cards | Easy | 20 minutes (3Doodler) |
| 2. Hatching chick card | Cards | Easy | Close to the flower card |
| 3. Dotty egg | Real eggs | Easy | Shorter than the Fabergé egg |
| 4. Lace egg shell | Real eggs | Intermediate | 30 minutes (3Doodler) |
| 5. Fabergé-style egg | Real eggs | Intermediate | 20 minutes (3Doodler) |
| 6. Smooth egg for younger makers | Real eggs | Intermediate | 45 minutes (3Doodler) |
| 7. Mini nest | Baskets | Intermediate | Close to the lace egg |
| 8. Easter basket with a handle | Baskets | Ambitious | Longer than any egg here, plus cooling |
| 9. Surprise egg | Real eggs | Ambitious | A little longer than the lace egg |
Easter 3D pen ideas by difficulty
Easy: cards and a dotty egg
Flat pieces come first, because nothing has to hold its shape on a curve. If traced outlines still wobble, see our guide to tracing a stencil with clean lines, or practise on fifteen easier warm-up projects.
1. Raised flower card. Trace small flowers and leaves, add centres in a second colour, then lift the petal tips with a cocktail stick while the plastic is still warm. Glue the cooled flowers on with a glue stick or double-sided tape, as 3Doodler does; it rates its version a beginner project of 20 minutes. You need a blank card and three or four colours.
2. Hatching chick card. Draw a filled egg as two pieces split by a zigzag, plus a small yellow chick. Glue the lower half flat, tuck the chick behind it and fix the upper half at a tilt above, like a lid. You need white, yellow and orange.
3. Dotty egg. A drained real egg decorated with rings of dots and short dashes, so you never draw a long line round the curve. Touch the nozzle to the shell rather than pressing: a drained shell cracks easily. Idea 5 explains the draining.
Intermediate: egg shells and a nest
These work on the curve itself, either on a real egg you keep or over a taped egg used as a mould. Read the curved-surface section below first.
4. Lace egg shell. A boiled egg wrapped in masking tape, the pattern pencilled and inked, clear tape on top, then a lace of plastic drawn one half at a time. The halves come off and are joined into a hollow egg. 3Doodler rates its crochet-style version intermediate, 30 minutes. Steps below.
5. Fabergé-style egg. Here the shell is the canvas. 3Doodler’s tutorial drains the egg through a hole poked in its base, sketches the design freehand or with a fine marker, then fills in colour until the shell is completely covered, with no step to take the plastic off: intermediate, 20 minutes. Drain it over the sink, then wash your hands with soap and water and clean the worktop, in line with the Food Standards Agency’s advice on avoiding Salmonella.
6. Smooth egg for younger makers. 3Doodler’s version for its Start pens covers a boiled egg in clear tape, fills one half at a time, then joins the halves and adds a hanging loop: intermediate, 45 minutes. With Start plastic, 3Doodler suggests smoothing the surface with your fingers before it hardens, and recommends that parents help lift the halves off. Never smooth hot PLA with bare fingers.
7. Mini nest. Loose brown and green loops drawn over the upturned base of a taped ramekin, built up into a shallow bowl, then slid off and filled with foil-wrapped eggs. It is a good rehearsal for the basket.
Ambitious: a basket and a surprise egg
8. Easter basket with a handle. A cross-hatched base and lattice walls drawn over a taped mould, a thick rim, and a handle drawn flat and welded on. You need plenty of one colour and a second for the rim. Weld two upright ears to the rim for a bunny basket. Steps below.
9. Surprise egg. A lace shell (idea 4) joined at one point only, so it opens like a locket. Once the shell is cold, slip a foil-wrapped chocolate inside and close it with ribbon. Never draw over the chocolate itself.
How do you draw on a curved surface?
Cover the egg in tape, mark guide lines and turn the egg rather than your hand, working one half at a time.
- Tape it first. 3Doodler covers boiled eggs in masking tape, draws the design on that, then adds clear tape, because PLA peels away more easily from clear tape. Skip the tape only when the plastic is meant to stay on.
- Draw a centre line. Work one half at a time and leave a gap at the line, as 3Doodler does. Each half then comes off more easily, and you close the gap when you join them.
- Hold the egg still. Rest it in an egg cup and turn it a little between strokes, so your pen hand keeps the same angle.
- Anchor, then draw short. On paper, 3Doodler anchors each line by pressing the nozzle onto the surface and letting plastic flow for a couple of seconds. On a real shell, touch rather than press. Short strokes follow a curve more easily than one long sweep.
- Make every line cross another. A lace shell holds only where lines touch; a loose end drops off when the shell comes free.
- Lift, don’t peel. Let the plastic cool, then ease each half off with a teaspoon and tweezers.
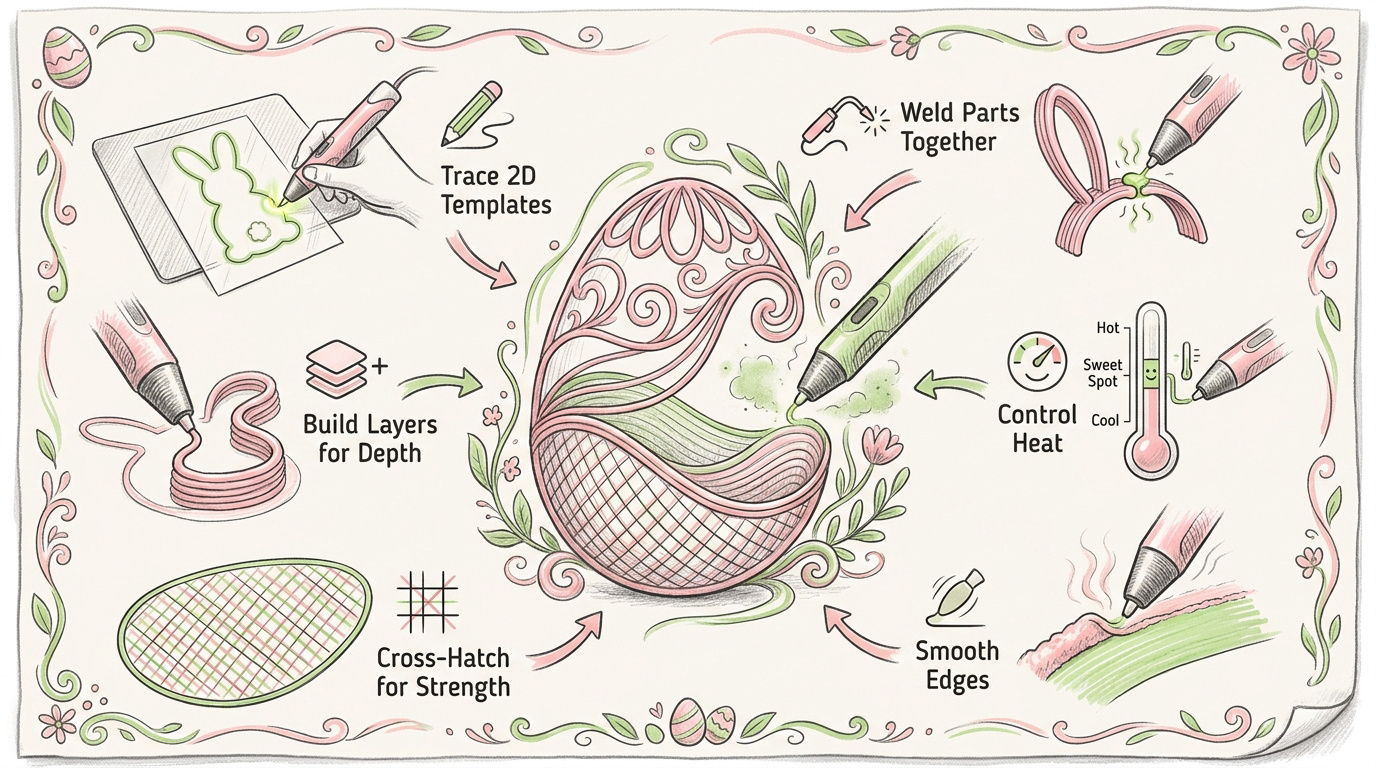
The same moves carry every project here: trace flat parts, layer for thickness, cross-hatch for strength, weld parts together, keep the heat within your filament’s range and tidy rough joins. To weld, 3Doodler’s advice is to touch the tip to both pieces while extruding.
What you need
A pen that suits the maker
Any hot pen that takes 1.75 mm PLA covers all nine ideas. The SCRIB3D P1 runs PLA at 160–210 °C and has a stepless speed slider, which helps when you slow down for a curve; SCRIB3D’s product page rates it 14+, and its manual says adult use only. For younger children, the 3Doodler Start+ has no external hot parts, according to 3Doodler, which designs it for ages 6 to 13; it takes only Start plastic. The maker’s age rating always applies, so the P1 is not for under-14s, and younger makers need an adult beside them.
Filament
The cards and eggs need many colours; the nest and basket use far more of one. The Yungden 30-Colour PLA Refills give you 3 m of each of 30 colours, including two transparent and four fluorescent shades, for a listed 180–210 °C. They don’t fit the 3Doodler Start+. For the basket, add one colour in bulk from our filament refills shelf.
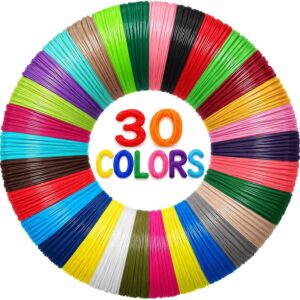
Thirty colours of 1.75 mm PLA at 3 m each: enough variety for cards, dotty eggs and lace shells, with transparent shades for a lighter lace. Not for the 3Doodler Start+.
A mat, templates and finger guards
Every project here starts on a heat-rated silicone mat. The AQTAQ 3D Pen Starter Kit‘s 45 × 28 cm mat has room for egg halves and basket parts. For finger guards and storage cases, browse our accessories and tools shelf.
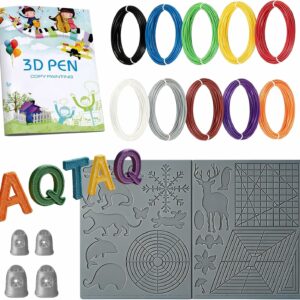
Templates and a transparent board to trace the cards on, four finger guards and some PLA to start with, alongside the mat. The pen itself isn’t included.
From the kitchen drawer
Eggs and an egg cup, masking and clear tape, a pencil and fine pen, a teaspoon and tweezers, a ramekin or small glass, blank cards, glue, ribbon and small scissors: 3Doodler advises snipping melted strand ends to avoid jams. Treat taped boiled eggs as moulds, not snacks. Filling the whole Easter break? Our week of half-term pen activities works just as well in the holidays.
Step outlines for three of the projects
Lace egg shell (idea 4)
- Hard-boil an egg, let it cool and cover it in masking tape.
- Pencil a centre line, sketch the lace pattern and go over it in pen.
- Cover the whole egg in clear tape.
- Rest it in an egg cup and draw the top half, stopping short of the centre line.
- Let it cool, turn the egg over and draw the other half, leaving the same gap.
- Ease each half off with a teaspoon and tweezers; an adult should do this with children.
- Hold the halves together, draw along the gap to join them and add a loop for ribbon.
Easter basket with a handle (idea 8)
- Turn a ramekin upside down and wrap it in masking tape, then clear tape.
- Fill a circle on the upturned base with lines one way, then a layer across them.
- Draw upright ribs down the sides, a finger’s width apart.
- Draw wavy rings round the ribs, touching every rib they cross, and finish with a double rim.
- Let it cool fully, twist the basket off and peel out any tape.
- Draw the handle flat as a strip two or three lines wide.
- Weld each end inside the rim on opposite sides: tack it, then draw along the joint.
Raised flower card (idea 1)
- Put a flower template under the kit’s transparent board, or under a clear sheet on your mat.
- Trace the petals and leaves, then add the centres in a second colour.
- Lift each petal tip with a cocktail stick while the plastic is warm.
- Once cool, peel the flowers off and stick their flat backs to the card.
Common questions
Can I put chocolate inside a 3D pen egg?
Yes, once the shell is completely cold. Wrap the chocolate in foil, place it inside and close the egg with ribbon or one small join away from the treat. Never draw over chocolate with the pen.
Does 3D pen plastic stick to a real eggshell?
It can: 3Doodler’s Fabergé-style tutorial draws straight onto a drained shell until it is covered, with no step to take the plastic off. If you want a shell that comes off, cover the egg in masking tape and then clear tape first.
Which Easter project suits a six-year-old?
Start with the pen, not the project: of the pens we list, only the 3Doodler Start+ is designed for ages 6 to 13, according to 3Doodler. With it, a simple card or the smooth egg over a taped boiled egg both work. A grown-up should lift the egg halves off, as 3Doodler recommends.
Sources
- Crochet-Inspired Easter Eggs — 3Doodler
- Eggspressive Easter Eggs — 3Doodler
- Create a Fabergé Egg — 3Doodler
- DIY Card 3D Pen Tutorial — 3Doodler
- Create+ Getting Started Guide — 3Doodler
- Salmonella — Food Standards Agency, GOV.UK