
The easiest 3D printed Christmas ornaments are flat: snowflakes, layered robins and stars, and discs with a name on the front. Below, the ideas run from easy to ambitious, ending with hollow shells that glow over LED lights. For each one you get the filament, the printer that suits it, how to add a hanging loop, and step outlines for three of them.
Want files ready to print? Download our free Christmas STL files: four baubles, three snowflakes, a star, a stocking, a candy cane, a stand-up tree and gift tags, all flat with no supports.
Christmas ornament ideas, from easy to ambitious
The table sums up the four kinds of ornament. The print lengths are our rough planning bands for one plate at default settings, not measured times: after slicing, your slicer shows the real estimate.
| Ornament | Level | Print length (rough guide) | Filament | Printer |
|---|---|---|---|---|
| Flat snowflakes | Easy | Short, even for a full plate | PLA in one colour | A1 mini or A1 Combo |
| Flat multicolour ornaments | Easy to intermediate | Short to medium | PLA in two to four colours | A1 Combo, or A1 mini with manual swaps |
| Personalised bauble with a name | Intermediate | Medium | PLA in two colours | A1 mini or A1 Combo |
| Hollow ornament lit by LEDs | Ambitious | Medium, plus fitting the lights | White or translucent PLA | A1 mini or A1 Combo |
Easy: snowflakes and flat multicolour ornaments
1. Flat snowflakes. Thin, six-armed shapes printed flat on the plate, in white, silver or ice blue. They’re the quickest win: one colour, no supports, and a whole plate prints at once. Thin arm tips can lift off the plate, so if yours do, add a brim in the slicer. If an arm looks patchy in the slicer preview, scale the snowflake up a little.
2. Flat multicolour ornaments. A robin, a Christmas pudding, a tree or a gingerbread house, built as a base in one colour with raised details in others. The best designs change colour by height: green base, then white icing on the top layers. Bambu Lab explains why that matters: waste depends on how many filament changes each layer needs, and a part whose colours are already stacked in horizontal bands needs very few.
Intermediate: personalised baubles with a name
3. Name baubles. A flat disc, star or bauble shape with a name, initials or “Baby’s first Christmas” on the front. Raised letters in a second colour read best from across the room. Bambu Studio’s Text Shape tool adds the text, and on a curved bauble its Surround surface mode makes the letters follow the curve. A set with every family member’s name is a classic present; steps below.
Ambitious: hollow ornaments lit by LED lights
4. LED lantern ornaments. A thin, hollow shell in white or translucent PLA that glows when a light sits inside it. Bambu Studio’s Spiral Vase mode prints this kind of shell as a single wall with no infill and an open top, so the light shines through the thin wall. On a shelf, a battery LED tea light drops in through the open top; on the tree, the open end slips over one bulb of a string of LED fairy lights. It only suits simple shapes, which is why it’s the ambitious one. The same shell-and-light approach powers the lanterns in our printed Halloween decorations.
Use LED lights only. SUNLU gives its PLA a heat deflection temperature of 55 ± 5 °C, so a real candle or tea light, or any light that runs hot, doesn’t belong inside a PLA ornament.
If you’d rather make decorations by hand with children, our 3D pen Christmas decorations cover that side, from stencil snowflakes upwards.
How do you add a hanging loop?
Build it into the print: a hole through a flat ornament, or a flat tab with a hole on top of a 3D one, then thread ribbon or a wire ornament hook through it. Many ornament models already include one, so check the model in your slicer before you add your own.
- Add a hole in Bambu Studio. Right-click the ornament, choose Add Negative Part and pick a cylinder. Scale it to the ribbon or hook you’ll use and move it near the top edge. The hole is cut only when you slice, so the original file stays unchanged.
- Leave a solid ring of plastic around it. A hole too close to the edge leaves only a thin strip of plastic, which can snap when the ornament catches on a branch.
- Keep the loop flat and chunky. On a flat ornament, put the hole in the same plane as the rest of the piece so it prints as part of it. On a bauble, a short, thick tab with a hole is the safer choice: a thin ring standing up from the top prints as a narrow stack of layers and is easy to snap off.
- Pick the right thread. Ribbon or cotton thread suits light, flat ornaments; wire hooks or fishing line suit heavier ones. Hang the heaviest on the sturdiest branches.
What you need
A printer that suits your ornaments
Every idea here prints in PLA on a compact open-frame printer. If you haven’t chosen one yet, start with our ranked list of 3D printers. The real question for ornaments is how many colours you want in one print.
The Bambu Lab A1 mini arrives assembled, calibrates itself and has a 180 × 180 × 180 mm build volume, plenty for a plate of snowflakes or name discs. It prints one colour as standard. For two-colour ornaments, Bambu Studio’s multi-colour printing with an external spool pauses at each colour change so you can swap the filament and press Continue; Bambu Lab lists the A1 mini as supported with up-to-date firmware and Bambu Studio. That works well when the colour changes on only a few layers.
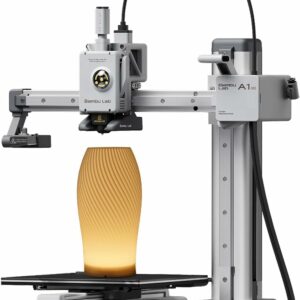
Assembled and self-calibrating, with room for a full plate of flat ornaments. Swap filament by hand for a two-colour name.
The Bambu Lab A1 Combo pairs a 256 × 256 × 256 mm build volume with the AMS lite, which feeds up to four colours in one print without you standing by. It’s the one for robins, puddings and trees in three or four colours. Every colour change purges filament, so multicolour prints take longer and use more material; filling the plate with copies spreads that waste across more ornaments.
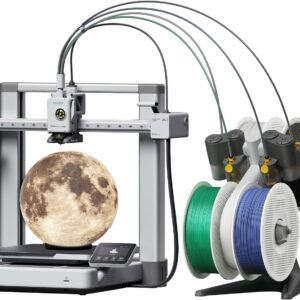
The AMS lite is included for up to four colours in one print, so layered robins and trees print without you standing by to swap filament.
Filament, models and small parts
A spool of SUNLU PLA Filament in white, red and green covers most ornaments, with a white or translucent spool for the lanterns. For the AMS lite, choose spools with a 53–58 mm hub hole; SUNLU’s 6.3 cm hub is outside that range, so feed a SUNLU spool from the external holder instead. Ornaments live indoors, so PLA is fine; just keep them away from radiators and out of a loft that gets hot in summer. If yours does, store them elsewhere or print in SUNLU PETG Filament, which SUNLU gives a heat deflection temperature of 70 ± 5 °C.
For designs, our guide to finding free 3D models compares MakerWorld, Printables and Thingiverse and shows how to judge a file before you print it. Respect each model’s licence: credit the designer, check that it allows changes before you share a personalised version, and check that it allows commercial use before you sell copies at a Christmas fair.
Add ribbon, thread or wire hooks, and for the lanterns, LED fairy lights or battery LED tea lights.
Step outlines for three ornaments
A plate of two-colour flat ornaments
- Choose a flat model whose colours change by height, such as a green tree with a white top layer.
- Open it in Bambu Studio and check each colour is assigned to the right part.
- Duplicate it until the plate is full. Bambu Lab notes that identical copies share the same filament changes, so the waste stays the same while you get more ornaments.
- Slice, then compare the filament used for the full plate with a single copy.
- On the A1 Combo, load both colours into the AMS lite. On the A1 mini, tick multi-colour printing with an external spool before the print starts, then swap the filament when prompted and press Continue.
- Let the plate cool, remove the ornaments and thread the ribbon.
Personalised bauble with a name
- Download a disc or bauble blank whose licence allows changes, or draw a simple disc yourself.
- Select it in Bambu Studio and open the Text Shape tool.
- Type the name, pick a font and click B for bold so thin letters don’t get lost.
- Set the operation to Part for raised letters, Cut to engrave them, or Modifier for flat letters in another colour.
- On a curved bauble, set the mode to Surround surface so the letters wrap around it.
- Assign the letters a second filament, add a negative cylinder for the hanging hole if the blank has none, then slice and print. On the A1 mini, raised letters on a flat disc need a single filament swap; letters wrapped round a curve, or flush Modifier letters, change colour on many layers, which suits the AMS lite better.
Hollow lantern ornament over an LED
- Choose a simple shape that is a single closed outline at every height, such as a star prism, a bell or a tall bauble.
- Measure the bulb of your LED fairy lights, or the LED tea light that will sit inside.
- In Bambu Studio, go to the Others tab, then Special mode, and turn on Spiral Vase. It sets one wall, no top layers and 0 % infill for you.
- Scale the shell so its open top fits snugly over the fairy-light bulb, or leaves room for the tea light to drop in. Several shells on one plate need the By object print sequence.
- Print in white or translucent PLA and let it cool before you remove it.
- Slip the open end over the bulb, or drop the tea light in, and switch on.
Some LED tea lights run on button batteries. The Child Accident Prevention Trust warns that a swallowed button battery can badly hurt or kill a small child, so keep spares up high and check that each battery compartment stays closed.
Common questions
What filament is best for 3D printed Christmas ornaments?
PLA, for almost everything: it prints easily, comes in every festive colour and ornaments live indoors. SUNLU gives its PLA a heat deflection temperature of 55 ± 5 °C, so keep PLA ornaments away from radiators and hot lofts. PETG, rated at 70 ± 5 °C by SUNLU, is the step up.
Can I put lights inside a 3D printed ornament?
Yes, if they’re LED fairy lights or battery LED tea lights. Never use a real candle or tea light, because PLA softens at around 55 °C according to SUNLU. Some battery tea lights use button batteries, which are dangerous if a small child swallows one, so keep them out of reach.
Do I need a multicolour printer for Christmas ornaments?
No. Snowflakes and one-colour stars print on any filament printer, and the A1 mini can make two-colour ornaments by pausing so you swap the filament by hand. A multicolour feeder such as the AMS lite on the A1 Combo becomes worth it when you want three or four colours on the same layers.
Can I sell 3D printed ornaments at a Christmas fair?
Only if each model’s licence allows commercial use. Some free models are licensed for non-commercial use only, so read the licence on the model page before you print copies to sell, or design your own ornaments from scratch.
Sources
- Reduce Waste during Filament Change — Bambu Lab Wiki
- Multi-colour printing with external spool — Bambu Lab Wiki
- Text Shape — Bambu Lab Wiki
- Negative Part — Bambu Lab Wiki
- Spiral Vase mode — Bambu Lab Wiki
- Button Battery Safety — Child Accident Prevention Trust