

Set the printer on a sturdy, level surface, remove the transport screws and packing, then let it run its own calibration: no paper test needed. Load PLA, print a preloaded model or a small sliced one, watch the first layer go down, and let the plate cool before you flex the part off.
A self-calibrating printer takes most of the guesswork out of a first print. This plan uses the Bambu Lab A1 mini as the worked example, with notes for the Flashforge Adventurer 5M. Keep your own quick start guide open too: screws, menus and plates differ between models.
New to all of this? Start with our beginner’s guide to 3D printing, which takes you from choosing a printer to a first successful print.
| Stage | Move on when |
|---|---|
| Place and unbox | Every transport lock is off |
| Calibrate | The on-screen setup has finished |
| Load filament | Plastic flows smoothly from the nozzle |
| Slice and print | The first layer goes down flat and stays put |
| Remove | The part is off and the plate is back |
Still deciding? Start with what to check in a first printer, then compare models in our ranked list of 3D printers. For most first-time owners, we’d start with the A1 mini this guide follows.
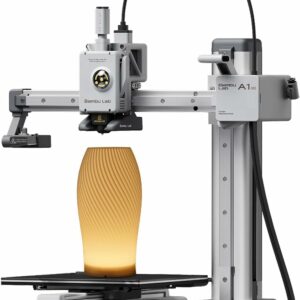
It arrives assembled, calibrates itself and suits PLA, PETG and TPU on its open frame. The trade-off is a 180 × 180 × 180 mm build volume, the smallest of the printers we list.
Where should you put a new 3D printer?
On a sturdy, level surface near a socket, with room for the bed to move. The A1 mini’s bed slides front to back as it prints, and Bambu Lab says to leave about 390 mm of clear space for it.
Bambu recommends a room at 10–30 °C with humidity under 85 %, so an unheated garage in winter may be too cold. It also advises against enclosing the A1 mini. Before you pick a bedroom, read our guide to fumes and where to put a printer.
What you need
- The accessory box. The A1 mini’s includes sample filament, a textured PEI plate, a scraper blade and the Allen keys you’ll need.
- A phone or computer. The Bambu Handy app links the printer to your account; Bambu Studio, the slicer, runs on Windows 10 or later and macOS 10.15 or later.
- Wi-Fi, or the microSD card. The A1 mini prints from a microSD card (Bambu fits a 32 GB one), so it works with no internet at all.
- Washing-up liquid. Bambu advises cleaning the plate with warm water and regular soap.
Step by step: from the box to a finished part
Stage 1: unbox it and remove the transport locks
These are Bambu Lab’s steps for the A1 mini. Don’t plug it in until they’re done.
- Lift the printer out, supporting the rear cover of the Z-axis rather than its metal rails.
- Pull out the foam under the bed and around the X-axis rail.
- Remove the four screws that lock the Z-axis limiter for transport.
- Cut the zip tie round the toolhead and take out its foam and cardboard.
- Tighten the three bed screws marked in green: the factory leaves them loose for the journey.
- Fit the purge wiper and the spool holder with the screws supplied.
- Connect the PTFE tube from the filament guide to the toolhead.
The Adventurer 5M is packed differently, so follow Flashforge’s own unboxing steps. Keep the box and foam in case the printer ever has to travel.
Stage 2: switch on and let it calibrate itself
- Plug in and switch on.
- Join your Wi-Fi and bind the printer in Bambu Handy when the setup asks, or skip both and do them later from the settings page.
- Follow the prompts through the first calibration, keeping hands clear of the moving bed.
Bambu Lab describes four automatic routines on the A1 mini:
- bed levelling: the nozzle touches the bed at 36 points in a 6 × 6 grid to build a height map, which it follows as it prints;
- resonance compensation: it vibrates the X and Y motors at different frequencies, then compensates to reduce ripples on walls;
- flow calibration: it senses extrusion force while it purges, much like pressure advance on other printers;
- motor noise cancelling: it measures each motor’s small imperfections and counteracts them.
Bambu says there shouldn’t be a need to level the bed by hand. On the Adventurer 5M, Flashforge recommends automatic levelling and a vibration test on first use, which takes about 7 minutes in all.
Stage 3: load the filament
- Hang the spool on the holder, the way round Bambu’s diagram shows.
- Push the filament into the PTFE tube until it stops at the toolhead.
- Tap Filament on the screen, then Load.
- When the nozzle starts heating (to 250 °C, according to Bambu), push the filament in again.
- Tap Done once plastic flows out smoothly, or Retry if you’re unsure.
We’d start with PLA. The A1 mini also takes PETG and TPU, but Bambu doesn’t recommend ABS, ASA, PC, PA or PET on it: they need higher bed and chamber temperatures, or they warp and come loose.
Stage 4: choose and slice a first model
The quickest first print needs no computer: tap Print Files on the A1 mini’s home screen and pick a model stored on the microSD card. Bambu recommends leaving bed levelling and flow calibration switched on. The Adventurer 5M keeps sample models in its memory for the same purpose.
For a model of your own, use Bambu Studio:
- Run the setup wizard: your region, printer, nozzle and filaments.
- Click New Project and drag in a model file, such as .stl or .3mf.
- Choose your printer, filament and a process preset. Bambu calls a 0.20 mm layer height the norm for most prints.
- Click Slice and check the preview, which shows the estimated print time.
- Click Print, leave bed levelling ticked and press Send.
No Wi-Fi? Export the sliced file to the microSD card and start it from Print Files. Leave everything else at the defaults for now; how a slicer prepares your model can wait until you’ve a few prints done.
On the Adventurer 5M, Flashforge recommends spreading the supplied glue evenly on the plate first. Bambu says the A1 mini’s textured PEI plate needs no glue for PLA, PETG or TPU.
Stage 5: watch the first layer
Stay with the printer until the first layer is down. Flashforge says you can leave the Adventurer 5M once the first one or two layers have printed successfully; watching those first layers is a good habit on any printer.
- Flat lines merging into a smooth sheet: let it carry on.
- Lines dragging behind the nozzle, or corners curling up: stop the print and work through the fixes for prints not sticking to the bed.
After that, the A1 mini’s camera lets you check progress from Bambu Studio or Bambu Handy.
Stage 6: take the finished part off
- Wait until the plate has cooled completely.
- Lift the magnetic plate off the bed.
- Bend the plate gently until the part pops free.
- Put the plate back, sitting flat on the bed.
Flashforge gives the same method for the Adventurer 5M. For a stubborn edge, use the scraper blade from the box, with your fingers behind it.
Mistakes to avoid on a first print
- Switching on with a transport lock in place. On the A1 mini, the bed screws need tightening as well as the Z-axis screws removing.
- Turning bed levelling off. Bambu recommends it for every print, because a magnetic plate may not sit in exactly the same spot twice.
- Touching the print surface. Bambu says skin oils affect adhesion, so hold the plate by its edges.
- Pulling a part off a hot plate. Bambu and Flashforge both say to let it cool first.
- Starting with ABS or ASA. Neither the A1 mini nor the Adventurer 5M has an enclosure; keep to PLA while you learn.
What to print next
Print the other models on the microSD card before you change any settings. Then try MakerWorld, Printables or Thingiverse, checking each model’s licence before you share or sell what you print; our guide to finding free 3D models compares them.
When the sample runs out, SUNLU PLA Filament is the usual next spool for any of the printers we list. SUNLU publishes settings of 200–210 °C at 50–100 mm/s with a 50–60 °C bed; check its 19.5 cm spool fits your holder.
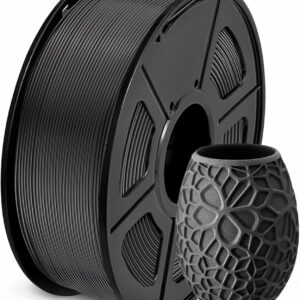
Everyday 1.75 mm PLA on a 1 kg spool, with a ±0.02 mm diameter tolerance according to SUNLU. It softens at around 55 °C, so keep prints away from heaters and hot cars.
If the 180 mm bed starts to feel cramped, see whether the bigger A1 bed is worth it, or browse all the 3D printers we list.
Common questions
How long does a first 3D print take?
It depends on the size of the model and the layer height: smaller layers take longer. Bambu Studio shows an estimate in the preview before you press print, so pick something small for your first go and allow extra time for unboxing and calibration.
Do I need to level the bed with a sheet of paper?
Not on a self-levelling printer such as the Bambu Lab A1 mini. Bambu says there shouldn’t be a need to level the bed by hand, as the nozzle probes the bed itself.
Can I print without Wi-Fi?
Yes. Bambu says the A1 mini can print from its microSD card with no internet connection. Firmware updates do need Wi-Fi.
Why does my printer shake during calibration?
It’s meant to. Bambu explains that the A1 mini vibrates its X and Y motors at different frequencies to measure resonance, then uses the result to reduce ripples on your prints.
Sources
- A1 mini Unboxing Guide — Bambu Lab Wiki
- A1 mini Introduction — Bambu Lab Wiki
- A1 mini FAQ — Bambu Lab Wiki
- First print with an external spool — Bambu Lab Wiki
- Bambu Studio Quick Start Guide — Bambu Lab Wiki
- Print Built-in Models on Adventurer 5M Series — Flashforge