
Headline speeds of 500 or 600 mm/s are the most a printer’s motion system can reach, not settings for good-looking parts. The real limits are how fast the hot end melts plastic, how quickly the fan cools it, and the material. Start from your slicer’s standard profile and slow down for first layers, overhangs, small parts and TPU.
Top speed is the figure printer boxes lead with, yet it says little about how fast your prints finish or how they look. Bambu Lab’s own slicer profiles show the gap: on a 500 mm/s printer, no printed feature is set faster than 300 mm/s, and the walls you see run at 200.
What does 500 mm/s on the box actually mean?
It’s the fastest the toolhead can travel once it’s up to speed. Bambu Lab lists 500 mm/s for the Bambu Lab A1 mini, and Flashforge lists 600 mm/s for the Flashforge Adventurer 5M. Neither is a speed you’d set for the walls people will see.
Two things get in the way first. One is acceleration: at the A1 mini’s maximum of 10,000 mm/s², the toolhead needs about 12.5 mm to reach 500 mm/s from a standstill and as much again to stop, so a line shorter than about 25 mm never gets there. The other is flow: at 500 mm/s, a normal line carries more plastic than the hot end can melt.
Bambu Lab’s own slicer shows what everyday settings look like. These are the speeds in Bambu Studio’s standard 0.20 mm profile for the A1 mini:
| Part of the print | Speed in the standard profile |
|---|---|
| Machine maximum (Bambu Lab’s spec) | 500 mm/s |
| Inner walls | 300 mm/s |
| Sparse infill | 270 mm/s |
| Outer wall | 200 mm/s |
| Top surfaces | 200 mm/s |
| First layer | 50 mm/s |
| Bridges | 50 mm/s |
| Overhangs, from moderate to steepest | 50, 30 and 10 mm/s |
Accelerations follow the same pattern: 6,000 mm/s² by default against a 10,000 mm/s² maximum, 5,000 for the outer wall, 2,000 for top surfaces and 500 for the first layer. Visible parts run slower and gentler than hidden ones. Only travel moves, where the nozzle isn’t laying plastic, are set as fast as the machine allows.
What actually limits print speed?
Four things: how much plastic the hot end can melt, how hard the printer can accelerate without shaking, how quickly each layer cools, and the filament. Which one bites first depends on the part.
Hot end flow: how fast plastic can melt
Bambu Lab calls this volumetric speed: layer height × line width × print speed, in mm³/s. Its own example is a 0.4 mm nozzle laying 0.45 mm lines at 0.2 mm layers. At 200 mm/s that’s 18 mm³/s of plastic; at 300 mm/s, 27 mm³/s. Run the same line at 500 mm/s and you need 45 mm³/s; at 600 mm/s, 54 mm³/s.
That’s more than these hot ends are rated for. Bambu Lab gives the A1 mini a maximum hot end flow of 28 mm³/s, measured with its own ABS at 280 °C on a single-wall test model: enough for about 310 mm/s on that line. Bambu Studio then sets a lower ceiling for each filament and slows any move that would go over it. Here’s what those ceilings mean on the A1 mini:
| Filament preset in Bambu Studio (A1 mini) | Maximum volumetric speed | Fastest speed for a 0.45 mm line at 0.2 mm layers |
|---|---|---|
| Bambu Lab’s own PLA (PLA Basic) | 21 mm³/s | About 230 mm/s |
| Generic PLA | 12 mm³/s | About 130 mm/s |
| Generic PETG | 8 mm³/s | About 90 mm/s |
| Generic TPU | 3.2 mm³/s | About 35 mm/s |
Two things follow. Even the profile’s 300 mm/s inner walls need 27 mm³/s, so with PLA Basic the slicer quietly slows them to fit. And the preset you pick matters as much as the speed you type: Bambu Lab describes its generic presets as conservatively tuned for a wider range of filaments, and says the true maximum can only be found by practical testing. Raise a preset’s ceiling only after a test print keeps up.
Go past the limit and Bambu Lab lists the results: walls thinner than intended (a 0.45 mm wall can come out at 0.35 mm or less), gaps, weak overhangs, sagging bridges, uneven shine and poorly bonded layers. Push harder and the nozzle can clog while the extruder gears grind into the filament.
What to look for: a published maximum flow figure, which tells you more than the top speed. Thinner layers let the toolhead move faster at the same flow, at the cost of more layers, and Bambu Lab says a larger nozzle raises the ceiling itself; our guide to choosing a bigger nozzle sets out what you give up in detail.
Acceleration and vibration: why fast prints ripple
Every corner means the toolhead stops one way and starts another. Klipper’s documentation explains that ringing, the faint echo of an edge repeated across a wall, comes from mechanical vibrations caused by quick changes of direction. A frame that isn’t rigid enough, loose or springy belts, misaligned parts and heavy moving mass all make it worse. Klipper’s tuning guide sets a printer’s maximum acceleration by checking where ringing stays small and where detail starts to blur.
That blur is the second cost of acceleration. Klipper notes that as acceleration rises, so does smoothing: in its test print, a 0.15 mm gap in the wall widens as acceleration climbs, even with input shaping, its form of vibration compensation, switched on. That’s why Bambu Studio’s profile gives the outer wall and top surfaces a lower acceleration than the rest of the print.
Fast printers fight ringing in software: Flashforge says the Adventurer 5M’s vibration compensation reduces surface lines and ringing, and the Bambu Lab A1 Combo and Elegoo Centauri Carbon list it among their automatic calibrations. Whether the bed or the head does the moving matters too; see how CoreXY and bed slingers differ. What to look for: vibration compensation as standard.
Cooling: each layer has to set before the next
Molten plastic needs time and air to firm up before the next layer lands on it. Slicers protect that with a minimum layer time: OrcaSlicer‘s documentation describes it as slowing printing so that no layer takes less than a set threshold, down to a minimum print speed. Bambu Studio’s A1 mini presets set that threshold at 6 seconds for Bambu Lab’s own PLA, 8 seconds for generic PLA and 12 seconds for generic PETG, with a floor of 20 mm/s.
That’s why a small model, or the tip of a tall one, slows to a crawl: the printer is waiting for the plastic, not struggling. OrcaSlicer also has a separate part-cooling fan speed for overhangs and external bridges past a threshold you choose.
What to look for: a slicer that slows small layers automatically, and a strong part-cooling fan. Flashforge, for example, describes rapid cooling through dual air vents on the Adventurer 5M.
The material: PLA, PETG and TPU flow differently
According to Bambu Lab, PLA melts at a lower temperature, transfers heat efficiently and flows easily once molten, so it sustains the highest speeds. PETG and ABS absorb heat more slowly and are much thicker when molten, which creates back-pressure in the nozzle. TPU is flexible, so it compresses and buckles when it’s forced in quickly, which gives it the lowest maximum volumetric speed of all.
Filament makers publish speed-linked settings. SUNLU pairs its PLA with 200–210 °C at 50–100 mm/s and 210–240 °C at 100–200 mm/s: faster printing needs more heat to melt the plastic in time. Bambu Lab adds a caution: raising the nozzle temperature by 5–10 °C can buy a little headroom near the flow limit, but it’s a last resort, because too much heat brings stringing, drooping overhangs and discolouration.
When should you slow down?
Whenever the part needs time more than you need speed. The profile handles some cases; the last column is up to you.
| Situation | What Bambu Studio’s A1 mini profile does | What you should do |
|---|---|---|
| First layer | 50 mm/s at 500 mm/s² | Leave it slow, even on a fast print. If the first layer doesn’t stick and lie flat, nothing above it matters. |
| Overhangs and bridges | Overhangs drop to 50, 30 and 10 mm/s as they get steeper; bridges run at 50 mm/s | Don’t switch the overhang slowdown off to save time. |
| Small parts and fine detail | Minimum layer time of 6 seconds for Bambu Lab’s PLA and 8 seconds for generic PLA | Print two or more copies side by side, so each layer takes longer and the printer slows down less. |
| TPU | Generic TPU capped at 3.2 mm³/s, about 35 mm/s on a standard line | Start from the filament maker’s slow settings. |
| Parts that must fit or carry a load | Caps flow at the preset’s limit | Stay on the standard or a quieter speed mode: under-extrusion thins walls and weakens layers. |
| Visible walls and top surfaces | Outer wall slower than inner walls and infill; top surfaces at 2,000 mm/s² | Save time on the inside of the part, not the outside. |
The time worth saving is inside the part, where inner walls and infill don’t show. Printing less of the inside saves time too: see how much infill you actually need. For utility parts and prototypes, Bambu Lab’s Sport mode raises the speed while staying within extrusion and cooling limits.
Our picks by reader profile
If you’re still comparing printers on everything else, from bed size to materials, start with our ranked list of 3D printers. Otherwise, the first yes below points to your profile:
- Is this your first printer, and are most of your prints small? The Bambu Lab A1 mini.
- Do you print larger PLA and PETG parts and want to swap nozzles for speed? The Flashforge Adventurer 5M.
- Do you already own a fast printer and want PLA with published high-speed settings? SUNLU PLA Filament.
- Do you want flexible parts? SUNLU TPU 95A Filament.
A first printer with sensible speeds built in: Bambu Lab A1 mini
The A1 mini arrives assembled, calibrates itself and prints at up to 500 mm/s. For a beginner, the bigger advantage is software: Bambu Studio’s tuned profiles start you at 200 mm/s outer walls, gentle first layers and a flow ceiling per filament, not at the box figure. Bambu Lab rates PLA, PETG and TPU as ideal on it and publishes its 28 mm³/s hot end flow.
Skip it if most of your parts are bigger than its 180 × 180 × 180 mm build volume, or if you want ABS or ASA, which want an enclosure.
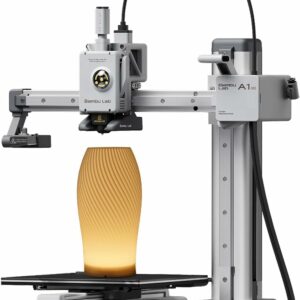
Bambu Studio’s tuned profiles keep the 500 mm/s printer at sensible speeds from the first print, with a published hot end flow figure.
Bigger parts at speed: Flashforge Adventurer 5M
The Adventurer 5M is an open CoreXY printer with a 220 × 220 × 220 mm build volume, 600 mm/s top speed and 20,000 mm/s² acceleration. Flashforge adds vibration compensation, dual air vents and a nozzle that heats to 200 °C in 35 seconds. The quick-release nozzle swaps in about 3 seconds, according to Flashforge, which matters here: the installed 0.4 mm nozzle is listed for PLA and PETG, while the optional 0.6 and 0.8 mm nozzles add TPU and fibre-filled PLA and PETG, and carry more plastic per line for large parts.
Skip it if you want ABS: Flashforge states that ABS filaments aren’t compatible with it. It also prints one colour at a time.
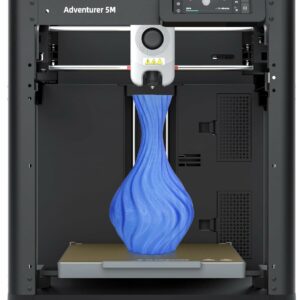
A 600 mm/s CoreXY with vibration compensation and a nozzle that swaps in about 3 seconds, so you can move to a bigger nozzle when a part calls for flow.
PLA with published high-speed settings: SUNLU PLA Filament
Once you move beyond a generic preset, you need numbers to start from, and the SUNLU PLA Filament publishes them by speed: 200–210 °C at 50–100 mm/s and 210–240 °C at 100–200 mm/s, with a ±0.02 mm diameter tolerance, according to SUNLU. Bambu Lab notes that a filament’s real flow limit can only be found by testing, so begin at the slower setting and step up with a test print each time.
Skip it for parts that sit somewhere hot: SUNLU gives a heat deflection temperature of 55 ± 5 °C. Check that its 19.5 cm spool fits your printer’s holder or feeder.
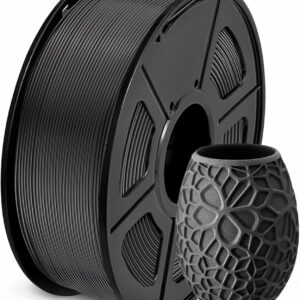
Everyday PLA with temperatures published for both 50–100 and 100–200 mm/s, so you know where to start when you speed up.
Flexible parts: SUNLU TPU 95A Filament
TPU is where speed matters most. The SUNLU TPU 95A Filament is a high-speed formulation with two published settings: 190–210 °C at 50–80 mm/s and 210–230 °C at 80–120 mm/s. That’s well above the 35 mm/s or so of Bambu Studio’s generic TPU preset, so start slow and move up only once prints come out clean. Feed it from a spool holder rather than a multicolour feeder, as Bambu Lab rules 95A and softer TPU out of the AMS lite, and on the Adventurer 5M fit the 0.6 mm nozzle that Flashforge lists for TPU.
Skip it if your part needs to be rigid: at Shore 95A it bends by design.
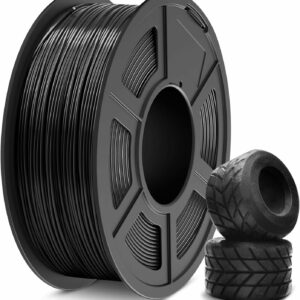
Flexible 95A TPU with published settings for slow and faster printing, a better starting point than guessing.
What to avoid
- Buying on top speed alone. Compare acceleration, a published flow figure, cooling and the quality of the slicer profiles.
- Raising a filament’s flow ceiling just to go faster. Bambu Lab warns that a wrong or inflated maximum makes the printer try to extrude beyond its capability, with clogs and ground filament to follow.
- Ludicrous mode for parts that have to look good or fit. Bambu Lab keeps it for drafts and quick test pieces.
- TPU through the Adventurer 5M’s standard nozzle. Flashforge lists TPU for the 0.6 and 0.8 mm nozzles only.
Common questions
Does printing faster make parts weaker?
It can, once you go past what the hot end can melt. Bambu Lab says plastic pushed beyond the maximum volumetric speed is laid down under-filled and cooler than intended, which weakens the bond between layers and can lead to cracks. Its Silent mode gives the plastic more time to melt and bond.
Why does my print run slower than the speed I set?
Usually one of two automatic limits. The slicer cuts the speed when a move would need more flow than the filament preset allows, and it slows small layers so each one has time to cool. Bambu Lab suggests checking the maximum volumetric speed in Bambu Studio, where the preview shows where that limit is reached.
Which Bambu Lab speed mode should I use?
Standard for most prints: it keeps the speeds, cooling and extrusion settings tuned for each material. Silent suits evening prints in a shared home and, by giving the plastic more time, can improve surfaces and layer adhesion. Leave overnight printing until you’ve watched several long prints finish cleanly. Sport is for utility parts and prototypes, and Bambu Lab keeps Ludicrous for very simple drafts, as it can cost surface finish, detail and layer bonding.
Should I raise the nozzle temperature to print faster?
Only within the filament maker’s range. SUNLU’s own PLA settings move up to 210–240 °C for 100–200 mm/s, against 200–210 °C at slower speeds. Bambu Lab treats a 5–10 °C rise near the flow limit as a last resort, because too much heat brings stringing and drooping overhangs.
Sources
- Volumetric speed and how it impacts 3D printing — Bambu Lab Wiki
- Bambu Lab A1 mini Technical Specification — Bambu Lab
- Bambu Studio printer, process and filament profiles — Bambu Lab (GitHub)
- Adventurer 5M 3D Printer — Flashforge
- Resonance Compensation — Klipper documentation
- Cooling — OrcaSlicer Wiki