
OrcaSlicer is a free, open-source slicer for Windows, macOS and Linux. Download it only from orcaslicer.com or its official GitHub releases page, run the setup wizard to add your printer and filaments, then import a model, slice it and send or export the file. After that, run the built-in calibration tests in the order its wiki gives.
This guide takes you from download to a first sliced plate, then through the Calibration menu one test at a time. If you’d like the basics of what a slicer does first, start with our plain-English guide to slicers. If your printer is a Bambu Lab and you’re weighing up Bambu’s own software, see getting started with Bambu Studio.
What you need
- A computer. OrcaSlicer runs on Windows, macOS (one universal build for Apple silicon and Intel Macs) and Linux.
- A filament printer with an OrcaSlicer profile. The project ships ready-made profiles for many brands. Its profile library includes the Bambu Lab A1 mini, the Elegoo Centauri Carbon and the Flashforge Adventurer 5M, each with several nozzle sizes.
- A spool of PLA. It’s the easiest filament for a first print and for calibration.
- A model file. OrcaSlicer opens 3MF, STEP, STL, SVG, OBJ and AMF files.
- Your home network, if you want to send prints wirelessly. Otherwise you’ll export the file and copy it across.
No account is needed: the OrcaSlicer site describes the software as free with “no account, no telemetry”. Still choosing a machine? Our ranked list of 3D printers covers the models we recommend.
Step by step: install, set up and slice
- Go to the official site. Type www.orcaslicer.com into your browser rather than clicking a search ad. The project warns that clickbait and malicious lookalike sites pretend to be the official one, and says www.orcaslicer.com is its only official website.
- Download a stable build. The download page says direct downloads come from the official GitHub releases page, and tells you to check the address reads github.com/OrcaSlicer/OrcaSlicer. Skip the nightly builds: the project itself says they “may be unstable”.
- Install it. On Windows, the project recommends the Microsoft Store build; an installer and a portable version are also offered. Some Windows PCs also need Microsoft’s WebView2 runtime. On a Mac, open the universal disk image and drag OrcaSlicer into Applications. On Linux, the project recommends Flathub; AppImages are offered too.
- Run the setup wizard. The wizard opens the first time you start OrcaSlicer. On the printer page, tick your exact model and the nozzle size fitted to it. If you miss something, run it again from Help > Setup Wizard.
- Pick your filaments. The wizard’s filament page sets which filament presets appear in your list. Choose your filament brand if it’s listed, or the generic profile for that material.
- Check the three presets. Back in the main window, the Prepare tab shows a printer preset, a filament preset and a process preset (layer height, walls, speed). Leave the process at its default for now.
- Add your model. Drag it onto the plate or use the Add Objects button. Lay it on its largest flat face.
- Slice. Press Slice plate (Ctrl + R). The Preview tab then shows the toolpaths layer by layer. Scroll through the first few layers before you print.
- Send or export. Use Print plate (Ctrl + Shift + G) if your printer is connected, or Export plate sliced file (Ctrl + G) to save the file and copy it to the printer the way its manual describes.
Save any change you make as your own preset rather than overwriting a system one. OrcaSlicer keeps user presets in its configuration folder, and the wiki notes that uninstalling the app doesn’t remove them.
How do you send prints to your printer?
It depends on the brand, because each maker connects its printers in its own way. For printers running Klipper, PrusaLink or OctoPrint, OrcaSlicer sends jobs over your network through its print host upload (Ctrl + J opens the queue).
Bambu Lab
The OrcaSlicer README says its optional Bambu networking plugin is based on non-free libraries from Bambu Lab. Bambu also documents Bambu Connect, a desktop tool that sends sliced G-code and 3MF files to its printers, including printers in LAN mode. Which route works can depend on your printer’s settings, so check Bambu’s wiki before you rely on one. The Bambu Lab A1 mini calibrates itself, which keeps the list of tests below short.
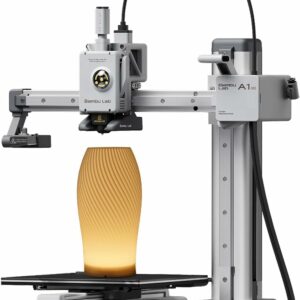
Arrives assembled and calibrates itself, and OrcaSlicer ships profiles for its 0.2, 0.4, 0.6 and 0.8 mm nozzles. The 180 mm bed is the trade-off.
Elegoo
Elegoo lists LAN-enabled Wi-Fi transfer for the Centauri Carbon, and OrcaSlicer’s bundled Centauri Carbon profile is set to use Elegoo’s network connection, ElegooLink. If the connection gives you trouble, export the sliced file instead and print it the way Elegoo’s manual describes.
Flashforge
Flashforge’s download page for the Flashforge Adventurer 5M lists configuration files for OrcaSlicer and OrcaSlicer slicing instructions for that printer. Follow those for the network set-up; OrcaSlicer’s own profile library also includes the Adventurer 5M.
Which calibration tests should you run, and in what order?
Open the Calibration menu at the top of the window. The OrcaSlicer wiki says to follow the tests “in the order shown, as each test builds on the results of the ones before it”. Run the filament tests for each new filament; the advanced ones are mostly about the printer and only need repeating after hardware changes.
| Order | Menu item | What it finds | Where the result goes |
|---|---|---|---|
| 1 | Temperature | The nozzle temperature that gives the best layers, bridges and least stringing | Filament preset |
| 2 | Max flowrate | How much plastic per second the hot end can melt cleanly | Filament preset, 10–20 % below the result |
| 3 | Pressure advance | How the extruder compensates for pressure at corners and speed changes | Filament preset |
| 4 | Flow ratio | The extrusion amount that gives a smooth, gap-free top surface | Filament preset |
| 5 | Retraction | The shortest retraction length with the least stringing (defaults often work) | Filament or printer settings |
The advanced tests come after these: Cornering, Input Shaping, VFA and Adaptive Pressure Advance, with the Tolerance test last of all. Most beginners can skip them. The wiki says most printers don’t need the cornering test, and that printers with a built-in accelerometer should use their own resonance calibration, which is usually more accurate. The Elegoo Centauri Carbon, for example, runs its own vibration compensation and pressure advance calibration, according to Elegoo.
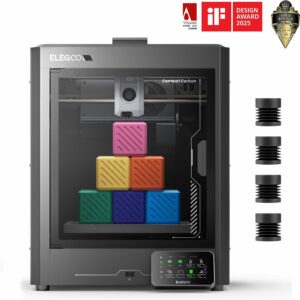
An enclosed CoreXY printer with a 320 °C hardened-steel nozzle that handles its own levelling, vibration compensation and pressure advance, so OrcaSlicer calibration stays short.
When you finish, start a new project to leave calibration mode, as the wiki advises. Then put the results to work on a real print.
Mistakes to avoid
- Downloading from a lookalike site. Use orcaslicer.com or the GitHub releases page it links to, nothing else.
- Choosing a near-match printer. A sister model or the wrong nozzle size gives the wrong bed size and start code. Tick the exact one.
- Ticking Bambu’s own Flow calibration on test prints. The wiki tells Bambu Lab owners not to select the printer’s Flow calibration option when printing the flow ratio and pressure advance tests.
- Running tests out of order. The flow ratio test starts from the value already in your filament preset, so earlier results feed later ones.
- Not saving results. Write each value into the filament preset and save it, or the next print ignores it.
- Chasing stringing with retraction alone. The wiki suggests drying the filament and checking the nozzle if a tower still strings badly. Our guide to fixing stringing in 3D prints covers the other causes.
What to try next
Once a calibrated PLA profile prints cleanly, change one process setting at a time and compare: wall count, infill and layer height. Then calibrate a second filament, such as PETG, by running the filament tests again. If you’re still deciding which printer to pair with OrcaSlicer, our guide on how to choose a 3D printer explains which features matter.
Common questions
Is OrcaSlicer free?
Yes. It’s open-source software licensed under the GNU AGPL v3, and the official site says no account is needed. Its optional cloud sign-in is for syncing and backing up presets.
Can I use OrcaSlicer with a Bambu Lab printer?
OrcaSlicer ships profiles for Bambu Lab printers, including the A1 mini. Sending prints relies on Bambu’s networking plugin or a route Bambu documents, such as Bambu Connect. Check Bambu’s wiki for what your printer’s settings allow.
Do I have to calibrate before my first print?
No. The built-in printer and filament profiles are a working starting point, so a first print can go straight from the defaults. Calibration helps once you change filament brand or want cleaner surfaces.
Will updating OrcaSlicer delete my presets?
No, according to the OrcaSlicer wiki: user presets live in a separate configuration folder that survives updates and reinstalls. On a Mac, uninstalling can offer to delete that folder, so say no if you want to keep them.
Sources
- OrcaSlicer README — OrcaSlicer project on GitHub
- Download OrcaSlicer — OrcaSlicer
- Calibration Guide — OrcaSlicer Wiki
- Keyboard Shortcuts — OrcaSlicer Wiki
- Bambu Connect (beta) — Bambu Lab Wiki
- Adventurer 5M downloads — Flashforge