
Bambu Studio is Bambu Lab’s slicer: download it from bambulab.com, run the setup wizard (region, printer, filaments), then add a model, pick your printer, filament and process presets, click Slice, check the preview and click Print plate. You can send the job over the cloud with a Bambu Lab account, over your home network in LAN mode, or on a microSD card.
This guide follows Bambu Lab’s Quick Start Guide and wiki for a new A1 or A1 mini owner, screen by screen. For the idea behind it, see our explainer on what a slicer actually does.
What you need
- A computer that meets Bambu Lab’s requirements. Bambu Studio runs on Windows, macOS and Linux (the Linux version comes from Bambu Lab’s GitHub page). Bambu Lab recommends 8 GB of RAM, with 4 GB as the minimum, and at least 2 GB of free disk space.
- Your printer, set up, on your Wi-Fi and loaded with filament.
- A Bambu Lab account, unless you plan to use LAN mode. Bambu Lab calls logging in optional but strongly recommended.
- PLA filament and a simple model. PLA is the easy starting point on an open-frame printer, and a small, flat-bottomed object prints quickly.
Still choosing a machine? Our ranked list of 3D printers and the guide on how to choose a 3D printer cover that decision. For a first Bambu Lab printer, the Bambu Lab A1 mini arrives assembled, calibrates itself and has a 180 × 180 × 180 mm build volume. The Bambu Lab A1 Combo moves up to 256 × 256 × 256 mm and adds the AMS lite for up to four colours.
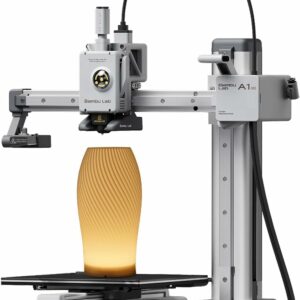
Assembled, self-calibrating and supported by Bambu Studio’s built-in presets, so the steps below work as written.
Step by step: from download to first print
Install and run the setup wizard
- Download Bambu Studio from the official Bambu Lab download page (bambulab.com), not from a mirror site.
- Install it (on a Mac, open the .dmg file and copy the app to Applications), then open it to start the setup wizard.
- Select your login region. Pick the region where your Bambu Lab account is registered: Bambu Lab warns that an account from one region can’t log in if Studio is set to another.
- Tick your printer and the nozzle fitted to it (the A1 mini’s standard nozzle is 0.4 mm); tick other sizes only if you own them. You can change this later from the slicer menu.
- Tick the filaments you want in the filament list. Make sure PLA is among them.
- Let the wizard install the Bambu Network plug-in. It needs an internet connection and handles printing over Wi-Fi or LAN, remote control and syncing your settings.
Connect Studio to your printer
- Log in with your Bambu Lab account. This turns on print history and syncs your settings between computers.
- Bind the printer. Bambu Lab recommends the Bambu Handy app (Devices tab, then + Bind Printer); log into the same account in Studio and your printer appears. From Studio itself, A series printers can bind with a PIN code: on the printer, open Settings > Account, pick your region and note the code, then in Studio open the Device tab, choose Bind with Pin Code and enter it.
Prefer not to use the cloud? Bambu Lab documents LAN Only Mode: on an A series printer, open Settings, scroll to page 3 and switch on LAN Only Mode. In Studio, find the printer (shown with a lock icon) in the printer list on the Device page and enter the access code from the printer’s screen. The trade-offs, per Bambu Lab: no Bambu Handy app, no starting prints from outside your home network and no print history.
Prepare the plate
- Click New Project.
- Add a model with the first icon on the toolbar, or drag the file into the window. Studio opens .3mf, .stl, .stp, .step, .amf and .obj files.
- Choose your printer from the Printer drop-down. The entry includes the nozzle size, so check it says 0.4 mm unless you’ve changed nozzles.
- Choose the plate type that matches the plate actually fitted to your printer.
- Choose a PLA preset in the Filament section (more on non-Bambu filament below).
- Choose a layer height in the Process drop-down. Bambu Lab calls 0.20 mm the norm for most prints.
- Click the auto-orientation button. It looks for a position with a small overhang area and a large, stable base, but Bambu Lab admits it sometimes picks a wrong orientation, so look at the result before moving on.
The few settings worth touching first
Bambu Lab advises beginners not to change parameters at random, so leave the presets alone except for two settings.
- Supports. Supports prop up overhangs that would otherwise sag. In auto mode, Studio adds them under any surface sloping less than the threshold angle from horizontal, 30 degrees by default. Normal supports project the overhang straight down to the plate; tree supports grow branches up to it from small contact points. A flat-bottomed first model with no overhangs needs none.
- Brim. A brim is a single-layer flat area around the base that helps the part grip the plate. The brim settings sit in the Other group, and the default, Auto, decides the width from the part’s shape, the filament and the print speed. If prints lift at the corners, our list of bed adhesion fixes in order goes further.
Slice, preview and send
- Click Slice at the top right (Slice All if your project has several plates).
- Check the Preview. Drag the bar on the right to step through layers, or use the arrow keys; it shows each layer’s number, height and time. Look for supports where you expect them and a solid first layer.
- If you change any setting, click Prepare at the top left, adjust, and slice again.
- Click Print plate at the top right. In the pop-up, choose your printer and the calibrations to run before printing, such as bed levelling and flow calibration.
- Click Send. The printer starts the job; follow it from the Device tab.
No network at all? Use the arrow beside Print plate and choose Export plate sliced file, save it to the printer’s microSD card, then start it from Print Files on the printer’s screen.
Using your own filament: presets for PLA
Bambu Studio’s system presets come with each supported printer and can’t be edited directly. For another brand, Bambu Lab’s suggested route is a user preset: start from a system PLA preset, change the settings, click the Save icon and choose User Preset. With preset sync switched on in Preferences, Studio uploads it to your account.
For SUNLU PLA Filament, SUNLU publishes 200–210 °C at 50–100 mm/s, 210–240 °C at 100–200 mm/s, and a 50–60 °C bed. Compare those with the temperatures in your chosen preset and save a SUNLU version if they differ.
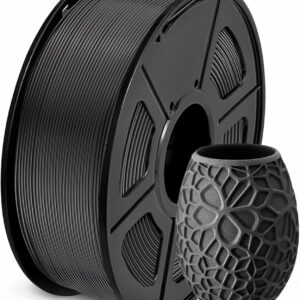
Everyday 1.75 mm PLA with published temperatures, so building a Bambu Studio user preset takes a minute.
Opening a MakerWorld print profile
Many models on MakerWorld come with a print profile: a Bambu Studio .3mf file holding the geometry plus the creator’s settings, including orientation, slicing parameters, supports, colours and the printer it was set up for. Open it in Studio and the arrangement and settings come with the model, so you don’t have to set them up yourself. Check the Printer drop-down straight away, because the profile names the creator’s printer, which may not be yours. Our guide to finding free 3D models compares MakerWorld with the other big libraries; respect each model’s licence.
Mistakes to avoid
- The wrong login region. If you can’t log in, check the region in Studio matches your account.
- A mismatched nozzle. Process settings change with the nozzle diameter, so a preset for the wrong nozzle slices with the wrong settings.
- Trusting a borrowed profile’s printer. A MakerWorld profile may be set up for another model; switch to your own before slicing.
- Editing without re-slicing. Any change after slicing needs a fresh slice before you print.
- Skipping the preview. A quick pass along the layer slider catches missing supports and floating parts before they waste filament.
- LAN mode by accident. It switches off the Bambu Handy app and remote printing.
What to try next
- Try tree supports on a model with overhangs, and compare the filament totals in the preview.
- Study MakerWorld profiles to see how other people set up a model, then change one setting at a time in your own.
- Add colour: with an AMS lite, included with the A1 Combo, one print can use up to four colours.
Common questions
Do I need a Bambu Lab account to use Bambu Studio?
No, but Bambu Lab strongly recommends one. Logging in enables print history, syncs your presets between computers and lets you start prints remotely. Without an account, you can still print over your home network in LAN Only Mode or from a microSD card.
Can I use Bambu Studio without Wi-Fi?
Yes. Slice as usual, choose Export plate sliced file from the arrow beside Print plate, save it to the printer’s microSD card and start it from Print Files on the printer’s screen. You lose remote monitoring, but the print itself is the same.
What file types does Bambu Studio open?
Bambu Lab lists .3mf, .stl, .stp, .step, .amf and .obj. A .3mf file can also carry settings, which is why MakerWorld print profiles use that format. An .stl file holds only the shape, so you choose all the settings yourself.
Can I use non-Bambu filament in Bambu Studio?
Yes. Pick a system preset for the same material, adjust the temperatures to the filament maker’s published figures and save it as a user preset. Bambu Lab gives third-party filament as a typical reason to create one.
Sources
- Bambu Studio Quick Start Guide — Bambu Lab Wiki
- How to enable LAN Mode on Bambu Lab printers — Bambu Lab Wiki
- Support — Bambu Lab Wiki
- Brim — Bambu Lab Wiki
- How to Create Custom Preset — Bambu Lab Wiki
- How to Upload Models and Print Profiles — Bambu Lab Wiki