These fifteen projects are in learning order, and each one teaches a single technique: flat fill, then outlines, then joining pieces, then lines that stand up on their own. Each idea gives the time to allow and what you need, and step outlines for three follow the list. If your pen is still in its box, start with the first-hour basics instead.
Want something ready to trace? Download our free printable 3D pen templates, with shapes, letters and simple 3D builds on A4 pages.
Which order should you make them in?
Start with filled shapes, because the fill hides a wobbly hand and makes a piece sturdy. Outline-only pieces come next: every line shows, and every line has to touch another to hold. Joining comes third, using flat pieces you can already draw. Standing lines come last, because they depend on timing as much as a steady hand. Move on when you can tick the check below, not when you’ve made every project in a stage.
| Stage | Technique | Projects | Move on when |
|---|---|---|---|
| 1 | Flat fill | 1 to 4 | A filled shape peels off in one piece, with no gaps |
| 2 | Outlines | 5 to 8 | Every crossing holds when you lift the piece |
| 3 | Joining | 9 to 12 | A welded corner holds when you pick the piece up by one panel |
| 4 | Vertical lines | 13 to 15 | Four uprights stand straight and at the same height |
15 beginner projects, grouped by technique
Times are rough planning guides for one piece, cooling included, not measured figures. First attempts and small hands take longer.
Easy: flat fill (projects 1 to 4)
Anchor each line by pressing the nozzle onto the surface and letting plastic flow for a couple of seconds, as 3Doodler describes. Then trace the outline and fill inside it with touching lines. SCRIB3D recommends holding its P1 at 65 degrees or more for flat drawing. A traced template is the easiest way to get clean lines from a stencil.
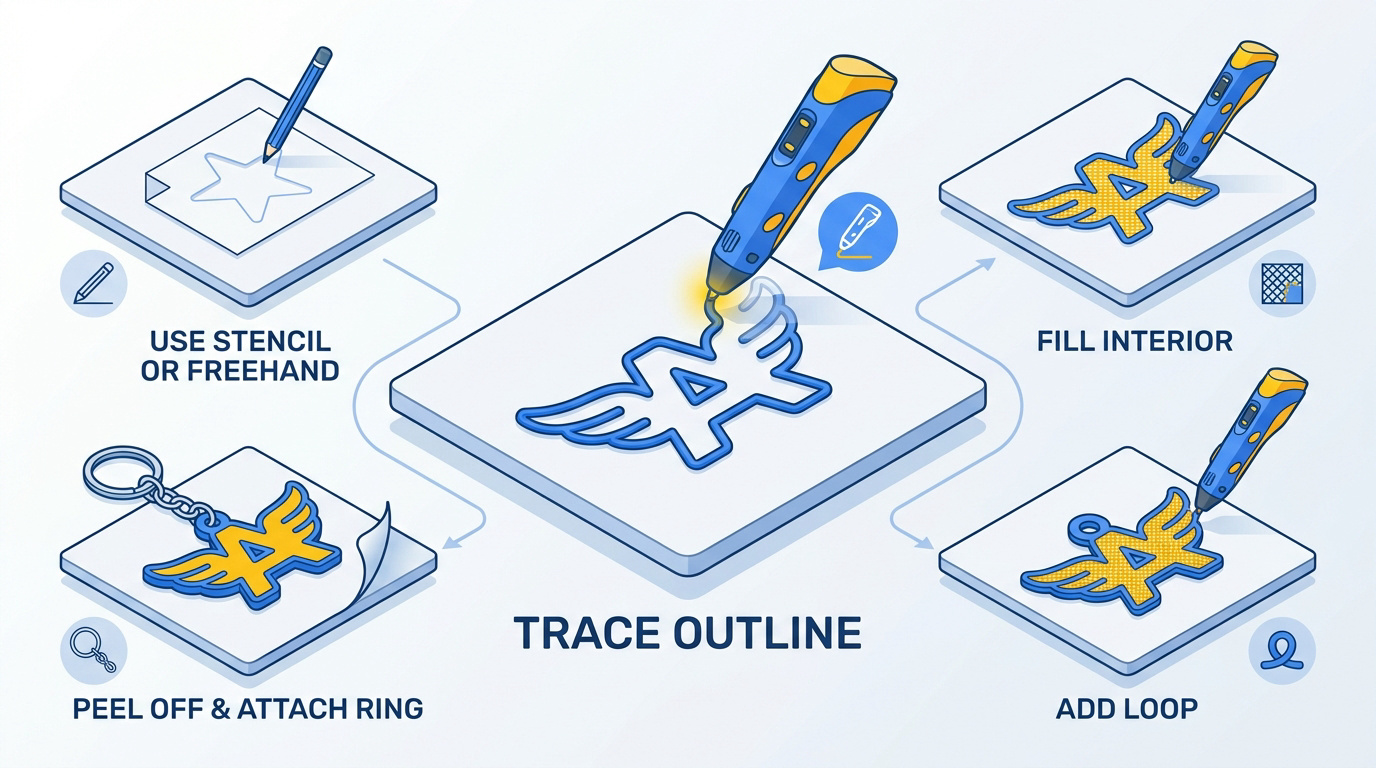
1. Keyring tag. An initial or a star with a thick loop at the top. It teaches outline, then fill, then a loop strong enough to carry keys; 3Doodler’s online stencil library has a custom keychain design. Allow about 20 minutes. You need two colours and a split ring.
2. Fridge magnet. A fruit slice or a cartoon face in two or three colours. It teaches filling neighbouring areas so the colours fuse at the edges. Allow about 20 minutes. You need a small craft magnet and strong glue.
3. Bookmark. A long strip with a shape at the top, filled with lines that all run the same way. It teaches keeping a long, thin piece flat; if it bends too easily, add a second layer across the first, but stop there so the book still closes. Allow about 25 minutes. You need one main colour and a ruler.
4. Coaster for cold drinks. A circle filled edge to edge, then given a second layer at right angles. It teaches filling a large area, and shows how much filament that takes. Prusa says PLA gets soft and deforms above 60 °C, so never put a mug fresh from the kettle on it. Allow about 40 minutes. You need plenty of one colour.
Easy to intermediate: outlines (projects 5 to 8)
With no fill to hide behind, outline pieces train an even speed and clean joins. Wherever two lines cross, make sure they touch while the plastic is soft, or the piece comes apart when you lift it.
5. Your name in joined-up writing. The first drawing exercise in 3Doodler’s manual for its Create pen: write your name in cursive, or in block letters that touch, then trace it in one continuous line, slow and steady. Bend the paper outwards to pop it off. Allow about 15 minutes. You need a marker, paper and one colour. Once joined-up names come easily, neater lettering in 3D is the natural next step.
6. Lattice heart. A heart outline crossed by loops, with a loop at the top for ribbon. It teaches anchoring every inside line to the outline. Allow about 25 minutes. You need one or two colours and ribbon.
7. Stained-glass suncatcher. A bold dark outline divided into cells, each filled with transparent filament. It teaches closed outlines: any gap lets the fill spill out. Allow about 40 minutes. You need black filament and two transparent colours. Prusa notes that PLA degrades under UV light, so a sunny window shortens its life.
8. Ring or bangle on a mould. Wrap a marker or cardboard tube in masking tape, as 3Doodler advises for any mould, draw a band of zigzags round it and slide it off once cool. It teaches drawing on a curve; 3Doodler’s library has a ring stencil too. Allow about 20 minutes. The same mould trick leads on to earrings, pendants and other jewellery.
Intermediate: joining flat pieces (projects 9 to 12)
3Doodler calls joining welding: while the pen is extruding, touch the tip to both pieces you want to join. For a long edge, tack the corners first, then draw along the whole joint. Snowflakes, baubles and small trees use the same skills, so they’re left to our Christmas decoration ideas.
9. Fun glasses. Frames drawn flat, with two arms welded on at the outer corners; 3Doodler prints a glasses stencil in its Create manual. It teaches a right-angled joint that takes a little strain. Allow about 45 minutes. You need one or two colours.
10. Cube from six squares. Six identical filled squares joined edge to edge; 3Doodler’s own example uses 3 × 3 cm pieces. It teaches accuracy, because one oversized square stops the box closing. Allow about 45 minutes. You need a square template.
11. Pen pot. Four lattice panels and a filled base, joined into an open box. It teaches long joints. Allow about an hour. You need one or two colours and a ruler. Steps below.
12. Butterfly with raised wings. A body and two wings drawn flat, the wings welded on at an angle. It teaches holding a piece still while a joint sets; 3Doodler’s library has a butterfly stencil. Allow about 30 minutes. You need three colours.
Ambitious: vertical lines (projects 13 to 15)
3Doodler’s method for a standing line: extrude an anchored blob about the size of a ladybird, lift the pen straight up about 4 cm, stop extruding without moving, wait five or six seconds, then pull away. Practise a row of single uprights first.
13. Wireframe cube. A flat square, four uprights from its corners and a second square welded across the tops. It teaches uprights of equal height. Allow about 45 minutes. Steps below.
14. Standing flower. A filled round base and a vertical stem, with flat petals and leaves welded on. It teaches combining a standing line with joined pieces; 3Doodler’s library has daisy and sunflower stencils. Allow about 45 minutes. You need green plus a petal colour or two.
15. Dolls’ house table. A filled square top, turned upside down, with four legs drawn straight up from its corners. It teaches building upwards from a finished flat piece. Allow about an hour. Turn it over once the legs have set.
What you need for all fifteen projects
A hot pen that takes 1.75 mm PLA covers every project here; if you’re still choosing, see our ranked list of 3D pens. The 3Doodler Start+, which 3Doodler UK designs for ages 6 to 13, takes only 3Doodler Start plastic or a compatible 2.5 mm pack, and that plastic stays softer than PLA. It handles all four stages; the thin uprights in projects 13 to 15 hold their shape better in PLA.
Filament
A multicolour pack covers the small projects, but the coaster, the pen pot and the cubes use far more of one colour. The Yungden 30-Colour PLA Refills give you 3 m of each of 30 colours, including the two transparent shades the suncatcher needs. For larger pieces, buy one colour in bulk from our filament refills shelf.
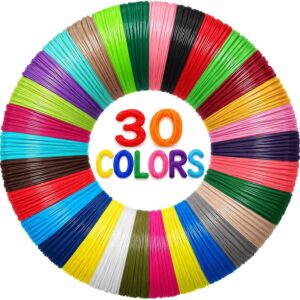
Thirty colours of 1.75 mm PLA at 3 m each, with transparent shades for the suncatcher and plenty of choice for magnets and tags. Not for the 3Doodler Start+.
A mat and templates
You need a heat-rated silicone mat for every project here; our guide to which surfaces work under a pen covers the alternatives. For tracing, the AQTAQ 3D Pen Starter Kit comes with a transparent drawing board to lay over a template, which is where the keyring steps below begin. Finger guards and pen cases are on our accessories and tools shelf.
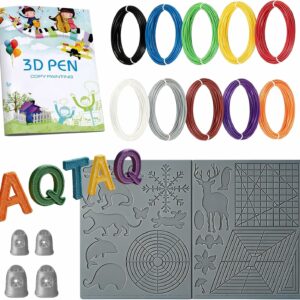
Forty templates to trace and a heat-rated mat with room for several panels at once, plus 50 m of PLA to start. The pen itself isn’t included.
Odds and ends, and safety
Keep masking tape, a ruler, split rings, craft magnets, glue, ribbon and small scissors to hand: 3Doodler says snipping melted strand ends helps you avoid jams. Hot pens really are hot: the SCRIB3D P1, for example, runs at 160–210 °C for PLA, and SCRIB3D rates it for ages 14 and up (its manual says adult use only, in a well-ventilated area). Under-tens should draw with an adult beside them, and the maker’s age rating always applies.
Step outlines for three of the projects
Keyring tag (flat fill)
- Put the stencil under the transparent board, or under a clear sheet on your mat.
- Anchor the line, then trace the whole outline.
- Fill the inside with touching lines that run the same way.
- Draw a loop at the top that overlaps the shape, and go round it twice.
- Let the tag cool, then peel it off slowly.
- Thread the split ring through the loop.
Pen pot (joining)
- Draw a square base and fill it.
- Draw four matching rectangles as wide as the base, and fill each with a lattice joined to its outline.
- Let every piece cool, then peel it off.
- Stand the first panel on one edge of the base and tack both corners.
- Draw along the whole joint to weld it.
- Weld the second panel to the base and to the first panel’s upright edge.
- Fit the last two the same way, then go over each upright seam.
Wireframe cube (vertical lines)
- Draw a square with sides of about 4 cm, and go over it twice.
- Build an anchored blob at one corner and lift straight up about 4 cm.
- Stop extruding and hold the pen still for five or six seconds, then pull away.
- Repeat at the other three corners, matching the height.
- Draw a second square the same size and let it cool.
- Lay it on top of the uprights and weld each corner.
Common questions
Can I do these projects with a 3Doodler Start+?
Yes, it handles all four stages. It takes only 3Doodler Start plastic or a compatible 2.5 mm pack, and that plastic stays softer than PLA. The thin uprights in projects 13 to 15 hold their shape better in PLA from a hot pen.
How much filament does a beginner project use?
Tags, magnets and names use very little. Filled coasters, pen pots and cubes use far more of one colour. A pack with 3 m per colour suits outlines and accents, so buy one colour in bulk for large fills.
Why do my vertical lines droop or bend?
Usually the pen moved before the plastic had set. Stop extruding at the top and keep the pen still for five or six seconds before you pull away, as 3Doodler’s manual describes. Lift in one straight movement, not an arc.
Sources
- Getting the most out of your 3Doodler Create — 3Doodler
- How to Draw in 3D with a 3D Pen — 3Doodler
- Create+ Getting Started Guide — 3Doodler
- 3D Pen Template and Stencil Library — 3Doodler
- PLA, material guide — Prusa Knowledge Base
- User Manual Scrib3D P1 — SCRIB3D